Introduction #
The Perxona Presentation SDK enables seamless embedding of an interactive AI avatar into third-party applications via a lightweight widget. The SDK provides configurable options for conversation handling, lifecycle events, rendering settings, theme customization, and behavior control.
Prerequisites #
Before you begin, you will need:
API Key: An API key is required to authenticate your widget. This key will be provided to you by your Perxona Account Manager after your organization is set up in our backend system.
To ensure secure access, please provide us with a list of the hostnames that will be making requests to the Perxona Backend Service. These hostnames will be added to an allowlist, preventing unauthorized access.Session Token: The Session Token and API Key are alternatives; either one is required for the widget to access backend services. The difference is that the Session Token is provided to developers for self-managed authorization. It is usually set with a specific expiration time. When the key expires, you can decide whether to generate a new key and have the service re-establish itself based on the new key, allowing your company to manage authentication security independently.
Agent Profile ID: Each
<sv-agent>instance is associated with an “Agent Profile.” You can configure and obtain the Agent Profile ID (a ULID string) through the Perxona Dashboard console. This ID determines which AI avatar and configuration your widget will use.
Quick Start #
Step1. Import Perxona SDK from CDN #
To integrate the widget into your application, include the following TypeScript snippet first:
<script
  type="module"
  src="https://cdn.perxona.ai/prod/latest/widget/entry/index.js"
></script>
Step2. Embedding the Widget and Layout Attributes #
The sv-agent widget is a custom web component that allows developers to quickly embed an AI avatar onto a website by inserting a specific code snippet into their application.
<sv-agent
  apiKey="<YOUR_API_KEY>"
  agentProfileId="<YOUR_AGENT_PROFILE_ID>"
  conversationMode="inputText"
  displayMode="fullPresentation"
  initFov='{"distance": 1, "horizontal": 0, "vertical": 0}'
>
</sv-agent>
<style>
  #widget-container {
    display: flex;
    position: relative;
    top: 50%;
    left: 50%;
    transform: translate(-50%, -50%);
    height: 880px;
    width: 500px;
  }
</style>
...
<sv-agent
  apiKey="<YOUR_API_KEY>"
  agentProfileId="<YOUR_AGENT_PROFILE_ID>"
  conversationMode="inputText"
  displayMode="fullPresentation"
  initFov='{"distance": 0, "horizontal": 0, "vertical": 0}'
>
</sv-agent>
Step3. Custom Widget Layout (Optional) #
You can dynamically set layout properties via Javascript methods if you prefer not to use attributes for configuration. If want to know more about the attributes see Widget Configuration section.
// Select the <sv-agent> element in the DOM
// and ensure it has the updateWidgetSetting method.
const widget = document.querySelector('sv-agent') as
  | (HTMLElement & {
      updateWidgetSetting: (settings: unknown) => boolean;
    })
  | null;

const layoutConfig = {
  presentationMode: 'bubble',
  readyToShowPolicy: 'showWhenAssetsReady',
  displayMode: 'fullPresentation',
  conversationMode: 'inputText',
  initFov: { distance: 1, horizontal: 0, vertical: 0 },
  cameraAngle: 'fullBody',
  colorMode: 'light',
  colorTheme: {
    primary: {
      light: '#fff',
      dark: '#000',
    },
  },
};

if (!widget) {
  console.error('sv-agent widget not found in the DOM.');
} else if (typeof widget.updateWidgetSetting !== 'function') {
  console.error('updateWidgetSetting method is not available on sv-agent element.');
} else {
  console.log('sv-agent is ready to use.');
  widget.updateWidgetSetting(layoutConfig);
}
Event Handlers #
The sv-agent widget provides the following event hooks during the avatar initialization and conversation lifecycle.
Agent Lifecycle Events #
| Event Name | Description |
|---|---|
disconnected | Triggered when the widget loses connection or switches to another avatar. |
agent-preparation | Fired when the agent connection process starts. |
downloading-assets | Called while assets are being downloaded. |
connection-start | Fired when the system is connecting to the AI backend. |
connection-done | Fired when the system is connected to the AI backend. Otherwise, it returns to disconnected and retries. |
ready | Triggered when the avatar successfully connects and is ready. |
Example (Listening for Events)
const widget = document.querySelector('sv-agent');
...
widget.addEventListener('life-status', (event) => {
  const status = event.detail.status;
  console.log('Perxona Life Status: ' + status);

  switch (status) {
    case 'disconnected':
      console.log('Perxona Widget: Connection lost or avatar switched.');
      break;
    case 'agent-preparation':
      console.log('Perxona Widget: Avatar connection process started.');
      break;
    case 'downloading-assets':
      console.log('Perxona Widget: Downloading assets.');
      break;
    case 'connection-start':
      console.log('Perxona Widget: Connecting to the AI backend.');
      break;
    case 'connection-done':
      console.log('Perxona Widget: Connected to the AI backend.');
      break;
    case 'ready':
      console.log('Perxona Widget: Avatar is ready.');
      break;
    default:
      console.log('Perxona Widget: Unknown Life Status');
      break;
  }
});
Asset Download Status Event #
The widget emits an asset-download-status event to report download progress per asset type.
Asset types are avatar, motion, and scene.
| Event Name | Description |
|---|---|
asset-download-status | Reports asset download progress and asset type. |
Payload
status: alwaysdownloading-assetsasset: one ofavatar,motion,sceneprogress: download progress percentage (0–100)
Example
const widget = document.querySelector('sv-agent');
...
widget.addEventListener('asset-download-status', (event) => {
  const { status, asset, progress } = event.detail;
  console.log(`Asset download status: ${status}`);
  console.log(`Asset type: ${asset}, progress: ${progress}%`);
});
Conversation Lifecycle Events #
| Event Name | Description |
|---|---|
idle | No active conversation. Waiting for user input. |
user-inputting | User is entering input via voice or text. |
user-input-done | User input is complete. The event returns the current user input to the event listener. |
awaiting-response | Backend is processing the request. |
awaiting-response-done | Widget has received the response from backend. |
rendering-response | Widget is rendering the AI response. |
timeout | Timed out waiting for a response from backend. |
Example
const widget = document.querySelector('sv-agent');
...
widget.addEventListener('conversation-status', (event) => {
  const { status, input } = event.detail;
  console.log(`Conversation Status: ${status}, input text: ${input}`);

  switch (status) {
    case 'idle':
      console.log('No active conversation. Waiting for user input.');
      break;
    case 'user-inputting':
      console.log(`User is entering input: ${input}`);
      break;
    case 'user-input-done':
      console.log(`User input complete: ${input}`);
      break;
    case 'awaiting-response':
      console.log('Awaiting response from backend...');
      break;
    case 'awaiting-response-done':
      console.log('Response received from AI.');
      break;
    case 'rendering-response':
      console.log('Rendering AI response.');
      break;
    case 'timeout':
      console.log('Timed out waiting for AI response.');
      break;
    default:
      console.log(`Unknown conversation status: ${status}`);
      break;
  }
});
Agent Response Message Event #
The widget emits agent-response-message events to report user inputs, agent responses, and response completion.
| Event Name | Description |
|---|---|
agent-response-message | Agent response stream messages from the widget. |
Event payload
eventName: alwaysagent-response-messageevent: one ofuser-input,agent-answer,agent-endmessage: message content (not included foragent-end)messageId: A correlation ID used to match eachuser-inputwith its correspondingagent-answerwhen multiple requests are sent at the same time.ssmlMessage(optional): SSML content for speech synthesiscreatedAt: message creation time
Example
const widget = document.querySelector('sv-agent');
...
widget.addEventListener('agent-response-message', (event) => {
  const { event: eventType, message, messageId, ssmlMessage, createdAt } = event.detail;

  switch (eventType) {
    case 'user-input':
      console.log(`User input received: ${message} (id: ${messageId})`);
      break;
    case 'agent-answer':
      console.log(`Agent response chunk: ${message} (id: ${messageId})`);
      if (ssmlMessage) console.log(`SSML: ${ssmlMessage}`);
      break;
    case 'agent-end':
      console.log('Agent response finished.');
      break;
    default:
      console.log(`Unknown agent response event: ${eventType}`);
      break;
  }
});
Widget Configuration #
The configuration you can setup via sv-agent widget attributes.
App Required #
| Attribute | Description |
|---|---|
apiKey | Your Perxona API key. This authenticates your widget. Keep this key secret. In the early access Perxona SDK. |
session_token | Session Token and API Key are alternatives; either one is required to access backend services. |
| The Session Token lets developers manage authorization and and expiration time themselves, | |
| giving you control over authentication security. More information please reference the below Create your session token. | |
agentProfileId | The ULID of the Agent Profile to use. This determines the AI avatar and configuration. Obtain this from the Perxona Dashboard. |
Create your session token #
Either apiKey or session_token allows you to use Perxona services normally. However, we provide a way for you to create and manage your own session_token, so your company can control its expiration time(for example, set it to expire in 3 hours) to enhance operational security.
You can use a JWT encoding library in your preferred programming language, or the online tool jwt.io to generate the token. Make sure to select HS256 as the JWT encryption algorithm.
Parameter descriptions:
iat: The “iat” (issued at) claim identifies the time at which the JWT was issued. This claim can be used to determine the age of the JWT. Its value MUST be a number containing a NumericDate value.exp: The “exp” (expiration time) claim identifies the expiration time on or after which the JWT MUST NOT be accepted for processing. The processing of the “exp” claim requires that the current date/time MUST be before the expiration date/time listed in the “exp” claim.
Sample
// parameter
{
  "iat": 1516239022,
  "exp": 1758004103
}

// Result: Encode JWT (HS256) as session_token.
eyJhbGciOiJIUzI1NiIsInR5cCI6IkpXVCJ9.eyJpYXQiOjE1MTYyMzkwMjIsImV4cCI6MTc1ODAwNDEwM30.p9iVZ3aYnkf5dNZ1jyyUdyH7uV7fPWhfIiHaEAJs8JE
Note: If both apiKey and session_token are present, authentication will prioritize apiKey. To use session_token for authentication, please remove the apiKey attribute.
Here are two methods for setting up the session_token.
Method 1: Set up via Web Component attributes
Add your own session_token in the widget attributes during initial widget setup.
<sv-agent
  // Remove the apiKey for session_token authentication.
  // apiKey="<YOUR_API_KEY>"
  session_token="<YOUR_SESSION_TOKEN>"
  agentProfileId="<YOUR_AGENT_PROFILE_ID>"
  ...
>
</sv-agent>
Method 2: Setup by TypeScript After the widget is loaded onto the webpage, you can pass in the configuration using TypeScript.
const widget = document.querySelector('sv-agent') as
  | (HTMLElement & {
      updateWidgetSetting: (settings: unknown) => boolean;
    })
  | null;

if (!widget) {
  console.error('sv-agent widget not found in the DOM.');
  return;
}

if (typeof widget.updateWidgetSetting !== 'function') {
  console.error('updateWidgetSetting method is not available on sv-agent element.');
  return;
}

widget.updateWidgetSetting({
  ...
  session_token: '<YOUR_SESSION_TOKEN>'
  agentProfileId: '<YOUR_AGENT_PROFILE_ID>'
  ...
});
Layout Config #
We offer a variety of layout configuration options to meet different requirements for displaying the AI Avatar widget. Depending on your company’s privacy policies, usage scenarios, and website style, you can customize the widget to fit your preferences. For example: you can set the widget’s theme color, choose between 2D or 3D display, control when the widget loads, select between full-screen or bubble mode, configure text and voice interaction modes, and adjust the camera position for the Avatar.
Display Policies #
Developers can configure readyToShowPolicy when the widget should be displayed:
If you are not set up, the default is ShowWhenAssetsReady mode.
| Option | Description |
|---|---|
ShowWhenAssetsReady | The entire widget shows after the necessary assets are loaded. Includes: |
ShowWhenAssetsLoading | Shows the widget immediately. A loading icon appears on the widget while the assets are loading. |
Display Mode #
Display mode is used to configure how the sv-agent is presented. You can choose to display only 2D, 3D, or use the fullPresentation mode.
In some cases, developers may want to integrate only the text input mode without showing the 3D Avatar and background, allowing users to interact with the AI through conversation. In this scenario, you can select the 2DPresentation mode.
If developers want to display only the 3D Avatar and control animations and conversation data themselves via our provided interfaces, you can select the 3DPresentation mode.
If no display mode is set, the default will be fullPresentation mode.
| Option | Behavior |
|---|---|
fullPresentation | The developer uses the full preset widget, including input fields and chat bubbles. |
3DPresentation | The developer builds their own UI while using the widget for rendering the 3D avatar only. |
2DPresentation | The developer builds their own UI while using the widget for rendering the conversation window only. |
Conversation Mode #
Developers can define conversationMode how to interact with the Avatar, either by responding with text input or voice commands.
If the attribute is not set or is set incorrectly, the default is inputText mode.
| Option | Behavior |
|---|---|
inputText | The user interacts with the avatar using text input. |
microphone | The user interacts with the avatar using voice commands. |
Theme Customization #
Developers can set up themes via a name or style provider. Customizable components include:
appearanceMode(string): Switches widget UI color scheme.
<sv-agent ... appearanceMode="dark" ...></sv-agent>
| Attribute | Description |
|---|---|
light | Light mode for bright environments. |
dark | Dark mode for low-light environments. Like this: 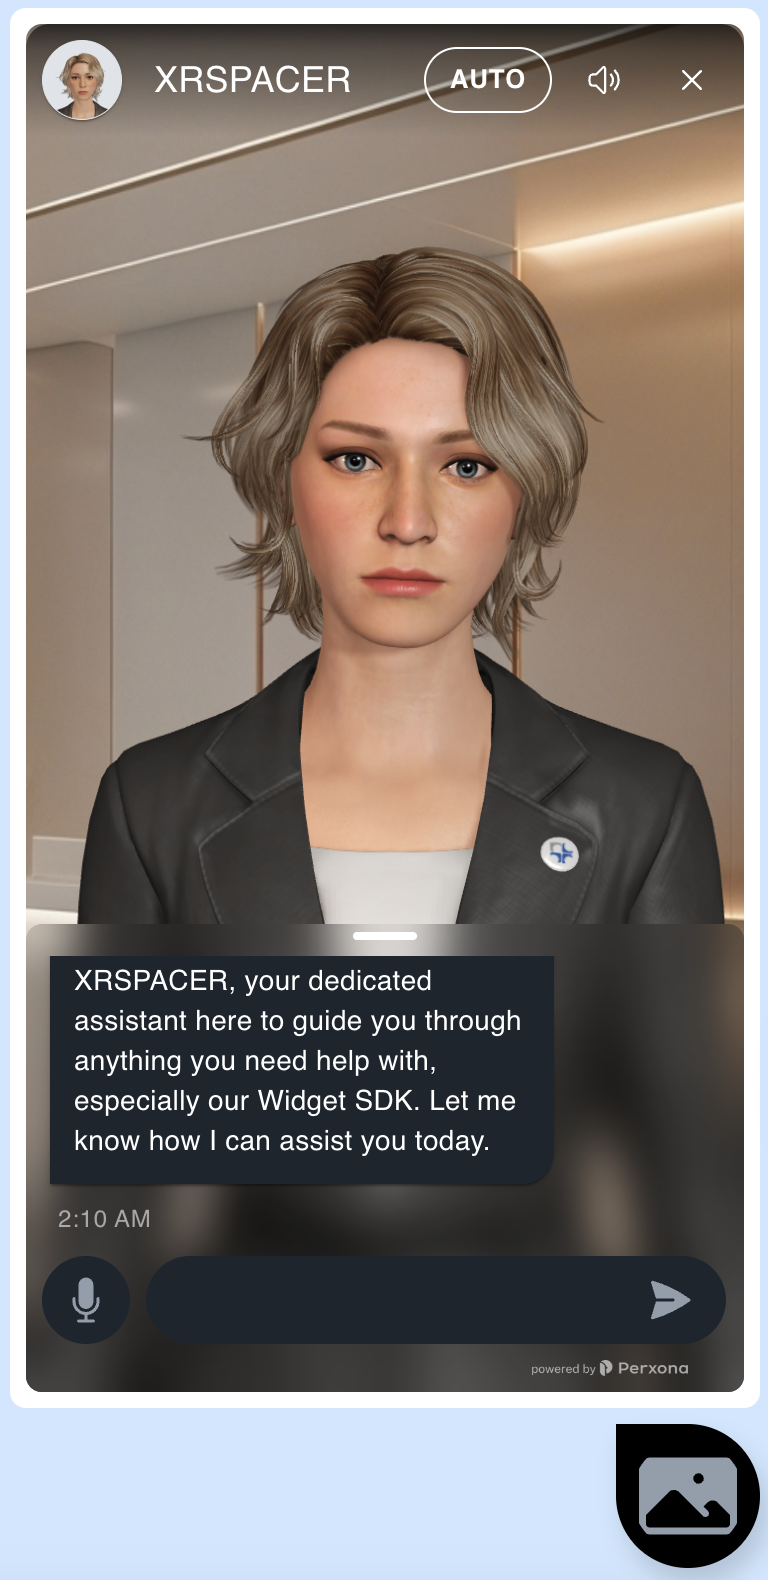 |
userBubbleColor(object): Provides theme color overrides for components (e.g., bubble color). See example below the color is#FF6200.
<sv-agent ... userBubbleColor="#FF6200" ...></sv-agent>
bubbleSetting(object): Configure bubble UI presentation details such as the icon source.
<sv-agent
  ...
  bubbleSetting='{"icon": {"src": "https://.../icon.png"}}'
  ...
></sv-agent>
Camera Positioning #
Fine-tunes the 3D camera field-of-view and offsets. The developer can set the camera position via attributes:
<sv-agent
  ...
  // Fov sample values see below picture.
  initFov='{"distance": 6, "horizontal": 5, "vertical": 4}'
  ...
>
distance: The distance of the camera from the avatar.horizontal: The horizontal offset of the camera. Positive values move the camera to the right, negative values move it to the left.vertical: The vertical offset of the camera. Positive values move the camera up, negative values move it down.
Camera Angle #
Sets the default camera framing of the 3D avatar. You can set the camera angle via attributes:
<sv-agent ... cameraAngle="fullBody" ...></sv-agent>
| Option | Behavior |
|---|---|
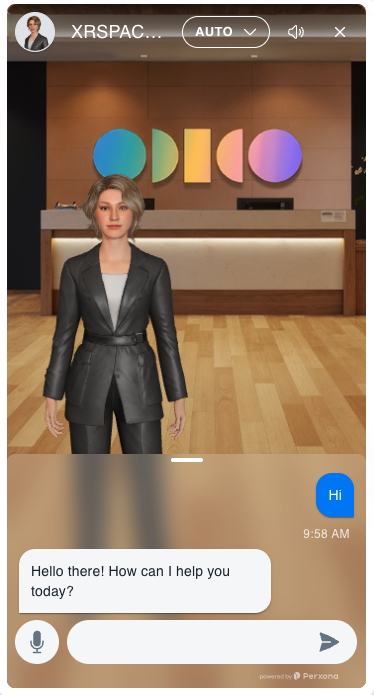
fullBody | For showing full-body avatar.  |
halfBody | For showing upper-body avatar. 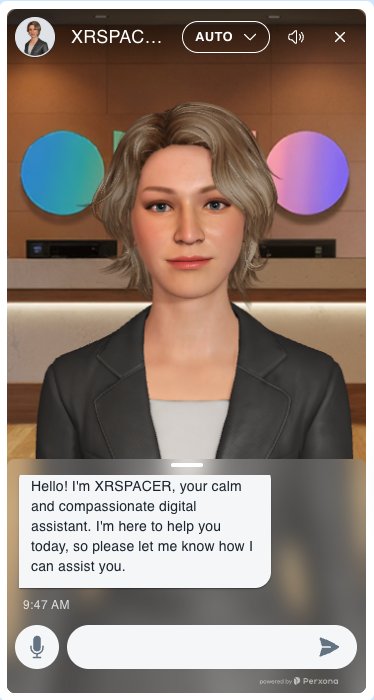 |
Presentation Rendering #
To render presentation with text and animation, use the following API:
event: You can use these existing event values for testing.
user_input: Creates a question block of user’s input in the chat UI, and initializes an answer block placeholder.agent_answer: Creates a question block of avatar’s input in the chat UI, and use TTS( Text to Speech ) to play the context.agent_end: When you are ending a conversation with the avatar, you should call this event. It will clear the last cached answer.
context: The text that will be rendered in the chat UI. It should be a string.
motion_id: You can use a motion_id alongside a reply to perform desired actions at your chosen points within the conversation, making your avatar more lively/expressive during a dialogue.You can use these existing default motion_id values for play animation at any time you want.
idle: The avatar idle animation is waiting for user input.talking: Talking animation is playing while the avatar is speaking.listening: Listening animation is playing while the avatar is waiting for user input.greeting: Greeting animation is playing while the avatar is greeting the user.error: Error animation is playing while the avatar is showing an error.custom: The other custom animations you can find the list of playlet in the Perxona Storyboard.
Example
const widget = document.querySelector('sv-agent') as
  | (HTMLElement & {
      agentReply: (data: unknown) => boolean;
    })
  | null;

if (!widget) return;

const userInputMsg = {
  event: 'user_input',
  message: 'Hi, nice to meet you~',
};

const agentResponse = {
  event: 'agent_answer',
  message: 'Hello! How can I help you?',
  motion_id: 'greeting',
};

const agentEnd = {
  event: 'agent_end',
  message: 'Goodbye!',
};

// Simulate user sending a message.
widget.agentReply.(userInputMsg);

// Control agent response a answer with message and specific animation.
widget.agentReply.(agentResponse);

// End the agent response.
widget.agentReply.(agentEnd);
Voice Control Methods #
The sv-agent web component exposes speech control methods for microphone-based input.
These methods are available after the widget is initialized and ready.
| Method | Return Type | Description |
|---|---|---|
startRecording() | Promise<boolean> | Starts speech recognition. Returns true if recognition starts successfully, otherwise false (for example: microphone permission denied, recognizer init failure, or speech service is unavailable). |
stopRecording() | void | Stops current speech recognition session immediately. Safe to call even if recognition is not currently running. |
getRecognitionStatus() | 'idle' | 'preparing' | 'recognizing' | 'unknown' | Returns current recognition lifecycle status. |
isRecording() | boolean | Returns whether the widget is currently in active recognizing state. |
getMicrophoneVolume() | number | Returns current microphone volume level for visualization (for example, mic level meter). Returns 0 when unavailable. |
Recognition Status Values #
idle: recognition is not running.preparing: widget is preparing microphone/recognizer.recognizing: recognition is actively listening.unknown: fallback status when speech module is not ready.
Example: Start/Stop Recording and Poll Status #
const widget = document.querySelector("sv-agent");

async function startMic() {
  if (!widget || typeof widget.startRecording !== "function") {
    console.error("startRecording is not available.");
    return;
  }

  const ok = await widget.startRecording();
  if (!ok) {
    console.warn(
      "Failed to start recording. Please check microphone permission and speech setup.",
    );
    return;
  }

  console.log("Recording started.");
}

function stopMic() {
  if (!widget || typeof widget.stopRecording !== "function") {
    console.error("stopRecording is not available.");
    return;
  }

  widget.stopRecording();
  console.log("Recording stopped.");
}

function printRecognitionState() {
  if (!widget) return;

  const status = widget.getRecognitionStatus?.();
  const recording = widget.isRecording?.();
  const volume = widget.getMicrophoneVolume?.();

  console.log("recognitionStatus:", status);
  console.log("isRecording:", recording);
  console.log("microphoneVolume:", volume);
}

// Optional: polling example (every 200ms)
const timer = setInterval(printRecognitionState, 200);

// Later when no longer needed:
// clearInterval(timer);
Feature Flags & Advanced #
User Activation Check #
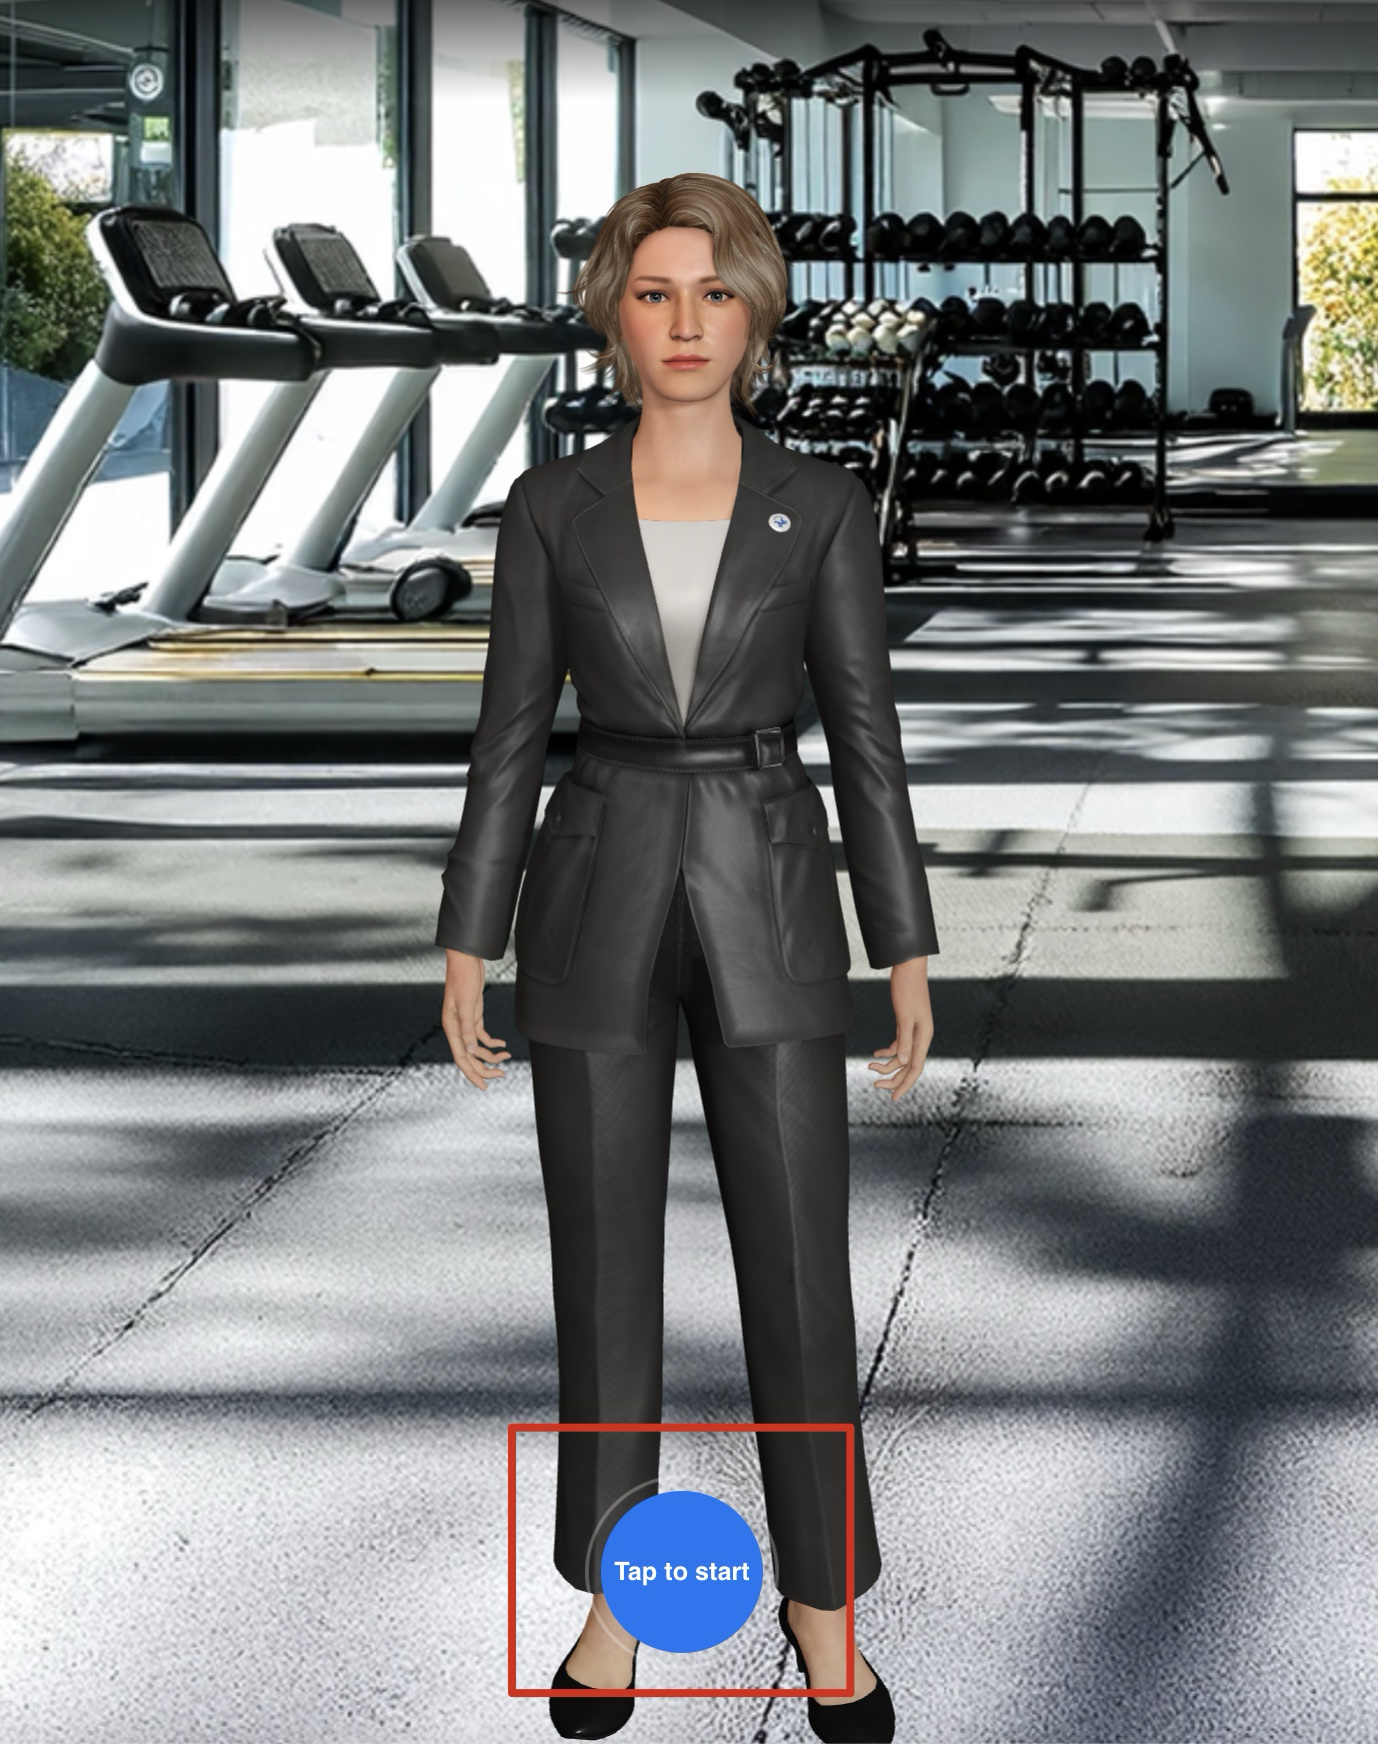
enableUserActivationCheck(boolean): Controls whether the widget waits for a real user interaction (for example, click/touch/keyboard) before enabling speech playback resources.
<sv-agent
  ...
  // Optional: Require first user interaction before speech playback becomes ready.
  enableUserActivationCheck="true"
  ...
>
By default, this value is true.
When enableUserActivationCheck is true:
- The widget follows browser autoplay restrictions more strictly.
- Speech playback resources are considered ready only after user activation.
- The interaction hint UI may be shown before the first user interaction, see below picture.
When enableUserActivationCheck is false:
- The widget skips the user-activation gate and attempts to initialize speech playback as early as possible.
- This is useful for controlled environments where autoplay and user-activation constraints are already handled by the host application — for example, native apps embedding the widget inside a WebView Integration.
WebView Integration Note
In WebView environments, the host application can programmatically relax the browser’s media autoplay restrictions, which is why WebView integrations typically do not need to follow standard browser privacy policies around user activation.
- iOS (WKWebView): Set
mediaTypesRequiringUserActionForPlaybackto[](empty). This allows audio and video inside the web page to play automatically without requiring a user gesture.- Android (WebView): Call
setMediaPlaybackRequiresUserGesture(false)onWebSettings. This bypasses the user-activation requirement and allows media to play immediately.When either of these native settings is applied, set
enableUserActivationCheck="false"on the widget so it aligns with the relaxed autoplay policy of the host environment.
Multimedia Display #
The supportedFeatures object lets you toggle optional widget features.
Multimedia Display Attribute allows you to show/hide multimedia displayer in the widget.
This feature lets you embed videos, PDFs, or images that are configured in the Knowledge Base tab of the console.
To enable it, set the multimedia attribute to true in the widget’s properties. By default, this value is already true.
The multimedia display is stacked on the browser’s main window body to prevent other user interface element from hiding or blocking it.
<sv-agent
  ...
  supportedFeatures={
    'multimedia': true
  }
  ...
>
When you enable multimedia display, the widget will dispatch a chat-attachment event to notify you when an attachment is presented.
Attachment Event carries attachment information in each displayed multimedia item. We provide multimedia-related events that are dispatched to the sv-agent component, allowing you to listen for them and create more engaging and interactive experiences when integrating with your website.
For example, when the Avatar starts displaying a video, you can disable or pause your own website’s video features to avoid multiple videos playing at the same time, which may cause audio confusion.
type: The attachment type. Currently supports three formats: image, video, and pdf. This corresponds to the MIME type of the attachment (e.g., video/mp4, image/png, image/jpeg, application/pdf).
source: The URL location of the corresponding media format.
const widget = document.querySelector("sv-agent");
widget.addEventListener("chat-attachment", (event) => {
  const { attachments } = event.detail;

  // The attachment is a array that used to display multiple media.
  const attachment = attachments?.[0];
  if (!attachment) return;

  const { type, source } = attachment;
  console.log(`chat-attachment MIME type: ${type}, mediaSource: ${source}`);

  switch (type) {
    case "video/mp4":
      // Example: Load the source url to display a video on your website.
      break;
    case "image/png":
    case "image/jpeg":
      // Example: Load the source url to display a image on your website.
      break;
    case "application/pdf":
      // Example: Set your website to dark mode for better reading experience.
      break;
  }
});
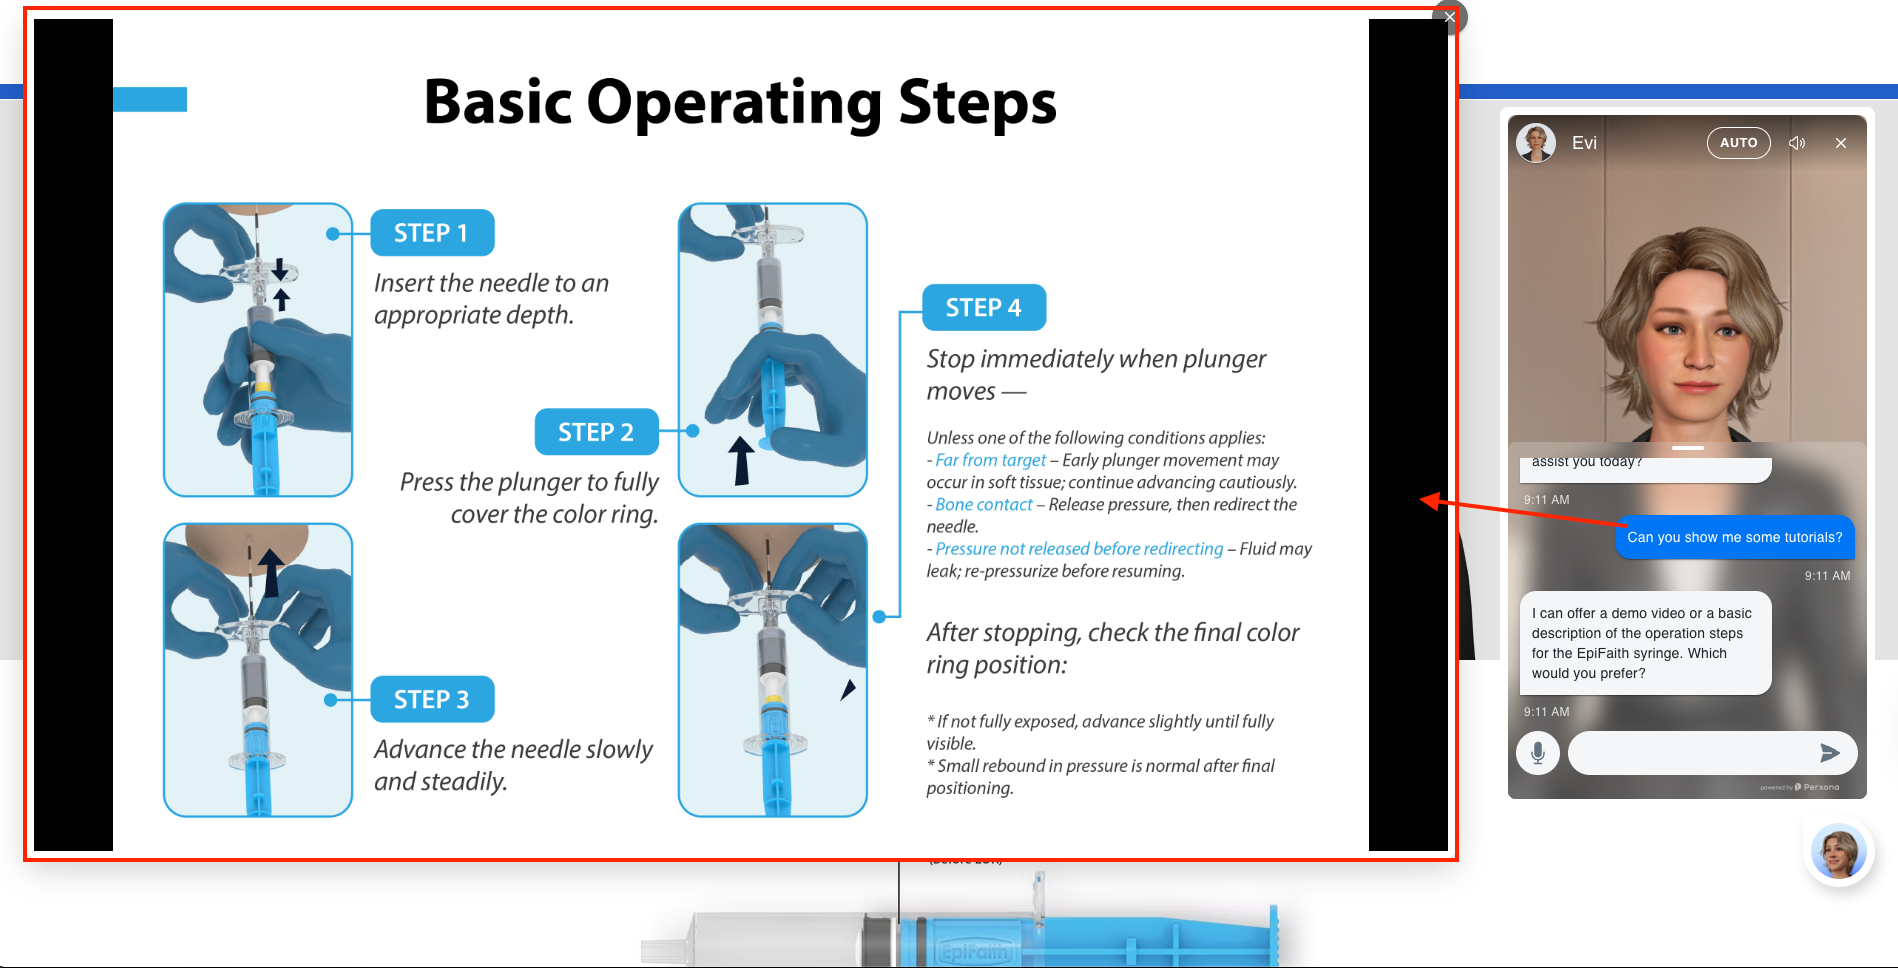
Here is the screenshot of the multimedia display in the widget:
When you ask some specific questions, the Avatar can show you related videos, images, or PDF documents as part of its response.
All multimedia’s Q&A pairs are configured in the Knowledge Base tab of the console.
But this feature is only available to cooperative customers now. If you have any related needs, please contact our Support.
Customer Reference ID #
customerRefId(string): Optional free-form identifier provided by integrators to attach a customer reference to the widget session.Customer conversation data is stored in our backend systems, and each organization sets the retention period according to regional privacy regulations. This conversation data is used during interactions with the Avatar to improve dialogue continuity and overall quality. For example, a user may prefer certain products or have specific settings — by linking those records with a
customerRefId, the Avatar can remember this information across conversations and provide more personalized service.
<sv-agent
  ...
  // Optional customer reference ID for session tracking.
  customerRefId="user-id-00001"
  ...
>
Then you can see the conversation history in the Conversation History tab of the console.

Mute Audio #
muted(boolean): Iffalse, the widget initializes with audio output muted (TTS disabled or muted at browser level).
<sv-agent
  ...
  // Optional: Initialize the widget with audio muted.
  muted=false
  ...
>
Conclusion #
The Perxona Presentation SDK provides a flexible, customizable, and developer-friendly way to integrate AI-powered avatars into third-party applications. With robust event handling, UI customization, and webhook support, developers can create engaging, interactive experiences.